この翻訳は、ソースガイドの最新の更新を反映していない可能性があります。 翻訳の更新に協力してください。 または ソースガイドを参照してください。
はじめに
本ガイドの最新版がiFixitスタッフによって作成されています。より新しい公式ガイドはこちらでご覧いただけます。
本ガイドでは、ニンテンドーDS Liteの下部カバーを外す方法を紹介しています。
必要な工具と部品
-
-
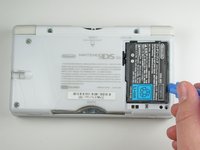
本体を裏返して置き、バッテリー取り付け場所がどこかを確認して下さい。
-
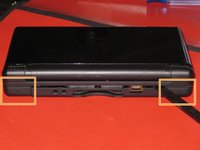
本体の右下の角にあるバッテリーカバーを固定しているプラスネジを見つけて下さい。
-
-


組み立て直す際は、本ガイドの手順と逆の順番で作業を行なって下さい。
11 の人々がこのガイドを完成させました。
チーム

Cal Poly, Team 16-30, Maness Winter 2010 Cal Poly, Team 16-30, Maness Winter 2010人のメンバー
CPSU-MANESS-W10S16G30
4 メンバー
29のガイドは作成済み
5件のガイドコメント
Not bad tutorial but I want to complain a little bit. Could you add more flashlights when you take photos of dark objects? It would make this tutorial more pleasant for viewing.
This tutorial worked great for me! My sons DS got wet and I was able to successfully open and dry it out. Cleaned up with alcohol and it’s running better than ever. Grateful for you!
The tri-point Y1 screwdriver is not working for me. I have tried both Y000 and Y1.
Same, I just bought the Y1 triwing screwdriver here with a digitizer for the ds lite and the screwdriver is too big.