この翻訳は、ソースガイドの最新の更新を反映していない可能性があります。 翻訳の更新に協力してください。 または ソースガイドを参照してください。
はじめに
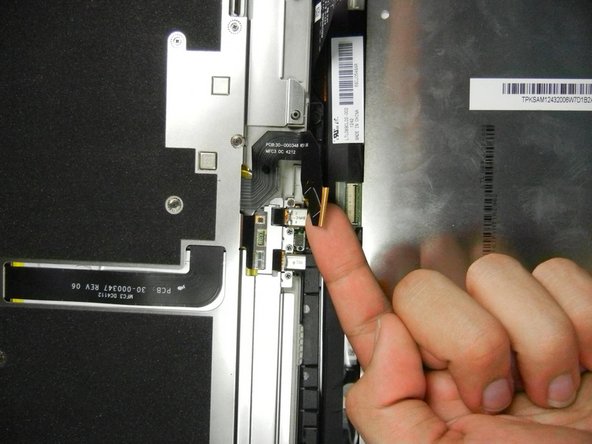
Kindle Fire HD 8.9インチのフロントガラスもしくはスクリーンが破損していれば、このガイドを使って、LCDディスプレイ、タッチデジタイザー、フロントパネルとフレームを含むディスプレイアセンブリ全体を交換します。
必要な工具と部品


デバイスを再組立する際は、これらのインストラクションを逆の順番に従って作業を進めてください。
デバイスを再組立する際は、これらのインストラクションを逆の順番に従って作業を進めてください。
60 の人々がこのガイドを完成させました。
以下の翻訳者の皆さんにお礼を申し上げます:
75%

Midori Doiさんは世界中で修理する私たちを助けてくれています! あなたも貢献してみませんか?
翻訳を始める ›
チーム

Cal Poly, Team 5-16, Forte Winter 2013 Cal Poly, Team 5-16, Forte Winter 2013人のメンバー
CPSU-FORTE-W13S5G16
5 メンバー
14のガイドは作成済み
21 件のコメント
Where are the rest of the instructions???? I now have a disassembled Kindle and no idea how to install the new screen!
Lisa Comer - 返信
At the end of every iFixit guide, next to the "I did it! Success!" button, there is a message that says "To reassemble your kindle, follow these steps in reverse order." However in some cases, there will be a slightly different message. In the case of this guide, the message says "To reassemble your kindle, follow these steps in reverse order. Just make sure that you successfully connect the two flex cables to each half of your kindle and that you then align the two halves on the side opposite the camera before reassembling it."
while you are at it, try replacing the battery for a better experience.
I did, checkout this battery for kindle here :