メインコンテンツにスキップ

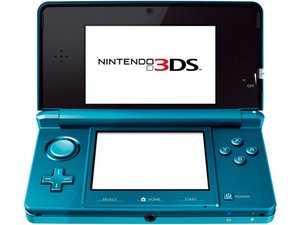
Nintendoのハンドヘルドデバイスは2011年2月に発売されました。モデル番号はCTR-001です。

455回答 すべてを表示

3DS doesn't charge. Powers on with charged battery.

Hi, I just got two 3DSs to experiment with repairing them.

The one in this question does not charge, but it will power on if the battery has charge.

When plugged into the charger, the battery terminals measure bit under 4V, however the charging light does not turn on (battery or no battery).

When I first tried charging it, the battery went from 2.43V to 3.10V but would not go any higher. During this whole time the charging LED was off. I put the battery in another 3DS, charged it and placed it back and it powered on.

If I try to plug the 3DS in, and then remove the battery, it does not stay on.

Anything I could try to repair this board?

Block Image

Block Image

この質問に回答する 同じ問題があります

この質問は役に立ちましたか?

スコア 0
1件のコメント

Comparing some values to the working one, next to (what I assume is) charge chip, one of the two capacitors measures around 3.9V difference across, but on the working one it's 0.6V. But both caps seem alright.

I'm suspecting it might be the chip itself, but I'm going to probe around a bit more later.

さんによる

コメントを追加

2件の回答

最も参考になった回答

@stereobucket let's see what you have going on here. Post some good pictures of your motherboard so we can see what you see. There are a few things that you want to do before measuring the circuit. When you say that But both caps seem alright., how did you check that. Not saying it is not the PMIC but you need to make sure that everything else is in good working order. The way I would proceed is by checking

Check fuses, F1 should be the power fuse and F2 the charging fuse. Check for continuity.

Check power supply connector. Re-solder or replace if required. Measure the voltage on the board where the connector is soldered to.

Check all connectors for lcds, cameras, wifi card are in place and properly attached.

While you try to charge, measure the voltage on the battery connection and see what voltages you get.

iFixitでの質問に画像を追加する方法

このアンサーは役に立ちましたか?

スコア 1

4 件のコメント:

Thanks for the tips. I've added the images of the board.

Fuses are alright, they connect. The power connector did separate on the shield, but the power pins were still connected. Nevertheless I added some solder to all.

I'm testing the board without components attached. Reference working board has different behaviour. One such different behaviour is that on the broken one the charge chip outputs 3.91 V out of both the battery and output pins, and will fall down to whatever the battery voltage is when it's inserted. The working one will rise to ~4V at the battery terminals once the charger is plugged in (but will fall to 0.6V with no battery).

I think the battery charger chip (smaller one above the buttons) is BQ24072.

One thing of note, the working one has the PGOOD pin pulled low while the nonworking hovers at ~1.8V at all times (battery, charger, both)

さんによる

@stereobucket "PGOOD pin pulled low while the nonworking hovers at ~1.8V at all times" sounds like it does not know that it is supposed to charge. Could still be the IC. Comfortable in may be trying a quick reflow? That's what I would try.

Gazillion test points....I wonder if there is anything about those. that would make live so much easier.

さんによる

I will try to reflow it. Should I do this with flux? I don't do soldering often so I don't have it at hand, but I've been meaning to order some so I can do other work as well. If I'd need it I'll do it when the order arrives.

さんによる

@stereobucket yes. Lots of flux :-)

さんによる

コメントを追加

I'm not an expert but it might be the chip. What about the charging port connection to the motherboard? The soldering there sometimes comes loose and you have to resolder it.

このアンサーは役に立ちましたか?

スコア 0
コメントを追加

回答を追加する

StereoBucket さん、ありがとうございました!
統計データ:

過去 24時間: 0

過去 7 日: 2

過去 30 日: 20

今までの合計 428