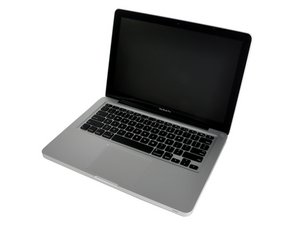
I would do each independently! One of the hardest part is trying to diagnose a problem after to many changes where done at the same time! Take your time as well rushing or forcing things only make things worse!
I try to do the easier ones first, so the order I would do is:
The trick is to validate the change worked before moving on. You don’t need to put the bottom cover back on if you have a clean smooth work surface (nothing on the surface which can damage your system).
Battery: When changing the battery I strongly recommend you download this app first: CoconutBattery run it with your old battery and take a snapshot of the apps main window so you have a reference. Now after you swap the battery do it again. Does the values look correct? If not post them here for us to see iFixitでの質問に画像を追加する方法
RAM & SSD upgrades:
Before doing these I would make sure the OS is at the newest for your release you are planing on working under. Thats not to say you need to upgrade to the latest version only make sure the maintenance updates have been applied. As an example El Capitan didn’t have TRIM services with its original release it came in the update for it.
RAM: Take a look at About this Mac > Memory Tab to see what you have now then again after the changeout.
SSD: You’ll want to first make sure you have a backup of your stuff using TimeMachine on an external drive.
You’ll also want to get a new HD SATA cable as in the upgrade you’ll want to replace yours (Trust me you’ll go nuts if you don’t) Here’s the part you want to order MacBook Pro 13" Unibody (Mid 2012) Hard Drive Cable and Yes! This is one for the 2012 model as its a better cable! Have this at hand before moving forward.
Next you’ll want to create an OS installer USB thumb drive following this guide: How to create a bootable macOS Sierra installer drive I don’t recommend upgrading to High Sierra or newer!
Both High Sierra and Mojave automagically update your systems format to GUID/APFS from the older GUID/HFS+ file system. While I like APFS on PCIe/NVMe drives, in newer systems it has issues with older SATA based systems like yours.
Next step is to prep your SSD using Disk Utility and connecting it externally via a USB to SATA adapter like this one StarTech 2.5" SATA to USB adapter. Or, you can just swap out the drive and use the USB OS installer drive you’ve created.
Follow this guide: MacBook Pro 13" Unibody Mid 2010のハードドライブケーブルの交換. Before you install the new cable place some electricians tape on the uppercase where the cable crosses over to protect if from the rough surface of the aluminum case as that tends to degrade the cable. In addition, you don’t want make hard creases on the bends of the cable you want nice arcs as the thin foil wires inside are easily damaged! The newer cable is a bit different and you’ll need to cut a small piece of the bracket off to get it to lay flat.
Once done use the USB to SATA adapter to hookup your old drive and then use Migration Assistant or at the end of the OS install process it will guide you to it to move your stuff back onto the new drive.


 113
113  52
52  62
62 


