メインコンテンツにスキップ

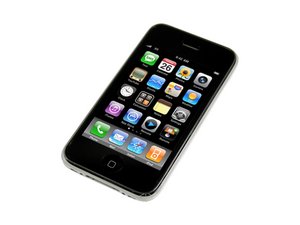
より早い処理スピードを可能にしたiPhone 3Gのアップグレード版です。このデバイスの修理は3Gと似ており、標準のドライバーと開口ツールが必要です。モデル番号 A1303 / 16 もしくは 32 GBの容量 / ブラックもしくはプラスチックの背面ケース

1500回答 すべてを表示

Proximity Sensor not powered after battery replacement

I recently replaced the battery in the iphone 3gs. Everything is working correctly except for the proximity sensor. I used a camera (iphone 4) to test to see if the sensor was lighting up during a call and it wasn't.

My investigations informed me that connector 3 is responsible for both the proximity sensor and the earpiece audio. I re-examined the cable and connector and everything looks undamaged and well seated. However, the sensor still won't work.

回答がありました! 回答を表示 同じ問題があります

この質問は役に立ちましたか?

スコア -1
コメントを追加

2件の回答

ベストアンサー

It sounds like you may have damaged, or have a defective sensor/ #3 flex cable. You may want to get a new assembly or just disconnect and reconnect your front assembly.

Try those steps, and if none of that works it could be the logic board or a setting on the phone.

このアンサーは役に立ちましたか?

スコア 0

5 件のコメント:

what assembly are you referring to when you say 'get a new assembly'. A new front assembly? or is there a 'proximity sensor assembly'?

さんによる

you can replace the cable no 3. I'd try just putting the cable in again first, it's usuallly just not in right. If it still doesn't work then you can buy the flex on it's own (very cheap) buy the midframe with the flex on (more expensive) or buy the entire front display with lcd/digitiser(expensive) I'd only buy the entire display if you were thinking of replacing it anyway for cosmetic reasons etc as it only costs a couple of dollars for no 3 and it's an easy job.

さんによる

I don't see the option on the ifixit.com parts section to buy just the flex nor do I see instructions on how to replace just the flex.

さんによる

They don't sell it here, try eBay etc. It is a straightforward replacement, I'll find a similar question and link it here. Sorry, I do have photos but haven't got round to uploading them. I think I'd better sort that out!!

さんによる

コメントを追加

WHen you buy the #3 ribbon, make sure to buy a few. There are a lot of defective ones out there. When I do the #3 connector repair, I go through a number of the ribbons for customers because I always get defective ones from the sellers on ebay.

Take off the bracket with a small flat head, applying even pressure under the speaker region. Once this is off, it is easy to put the new one on. Line up the holes and use a screwdrivers shaft to push the ribbon into the 90 degree bend and snap it back in. Screw in, and test the phone. Viola! Contact me if you need anymore help.

このアンサーは役に立ちましたか?

スコア 0
コメントを追加

回答を追加する

msollog さん、ありがとうございました!
統計データ:

過去 24時間: 0

過去 7 日: 0

過去 30 日: 0

今までの合計 2,261