メインコンテンツにスキップ

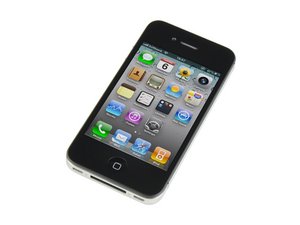
iPhoneの第4代目で、修理はそのままパーツを直接交換するだけです。しかし、正面ガラスとLCDはセットで交換する必要があります。容量はGSM / 8,、16m32 GB / モデル番号 A1332 /本体カラーは黒と白色

2375回答 すべてを表示

Tips for headphone jack replacement for iPhone 4?

I'm current 75% complete on converting a black iPhone 4 to white. I've replaced the front panel & LCD, back panel, and dock connector but the headphone jack has been a little unnerving. Mostly looking at it, and the piece that was supplied appears to be correct, but I'm waiting for someone else to tear into it and provide a guide for that replacement. If anyone has attempted the headphone replacement, please give me some tips on the proper steps. Thank you great community!

回答がありました! 回答を表示 同じ問題があります

この質問は役に立ちましたか?

スコア -1
2 件のコメント

did you ever replace the jack?

i have blown mine and im looking for a guide...

さんによる

Sorry Dave, haven't found a solution just yet. I don't know if anyone has a proper teardown just yet.

さんによる

コメントを追加

2件の回答

ベストアンサー

Thanks tamhoangngo, I plan on doing the very same, so will refer to your instructions. Thanks!

Update

I have now successfully change both the headphone jack, and dock connector for white, what I ended up doing is blog about it, and detail it there. You can find all the information needed on the iPhone 4 White headphone jack replacement here..

[IMG]http://farm6.static.flickr.com/5250/5248...[/IMG]

http://www.nokiadna.com/2010/12/white-ip...

I have just swapped the black Dock Connector for a white one now too, and will put a guide together for this process, which is far easier to do that the headphone jack!

[IMG]http://farm6.static.flickr.com/5005/5251...[/IMG]

このアンサーは役に立ちましたか?

スコア 1

3 件のコメント:

No problem, see if you can take a few pics if you can during the process!

さんによる

nice guide, pdf'd

さんによる

Well done Mickyfin! Ironic you have an instructional blog about the Apple iPhone 4 on a site with a root name of NokiaDNA.com. :)

さんによる

コメントを追加
最も参考になった回答

I finally did it after giving up looking for a guide. I didn't create a break-down but I'll give a few pointers. Difficulty was moderate, must pay close attention to small details to complete properly.

-Break down the phone so the battery, vibrator, and motherboard is out.

-Start by gently prying on the bottom of the headphone jack until it comes out of it's space. Once the headphone jack is out, one should be able to easily discern the ribbons, where they are going and how to route the new ribbon cables.

-Now that the headphone jack is out, proceed to remove the 5 screws holding down the silent switch as well as the volume keys. The volume keys have a plastic black sticky cover that can be reused which i would recommend doing. Also, take note of the metal cover over the silent switch mechanism. It can only be reassembled a certain way so pay attention to what your doing.

-Since the ribbons and jack should be freed now, begin separating the metal pieces that must be reused on the new jack and ribbon.

-Reassembly was easiest for me by starting with the volume keys first. Slowly applying the sticky portions of the ribbons is also ideal. Remember to refer back to your old ribbon and jack to get an idea of how to bend the cables. Anyways, best of luck.
このアンサーは役に立ちましたか?

スコア 1

2 件のコメント:

No problem, yes, would you believe, Im actually a Nokia enthusiast.

さんによる

Great Job! I will accept yours as the best response. You deserve it!

さんによる

コメントを追加

回答を追加する

tamhoangngo さん、ありがとうございました!
統計データ:

過去 24時間: 0

過去 7 日: 0

過去 30 日: 0

今までの合計 7,673