メインコンテンツにスキップ

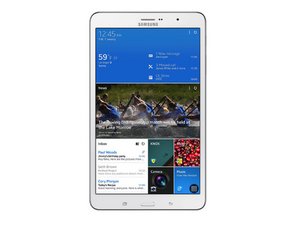
The Galaxy Tab Pro 8.4, produced by Samsung, is an Android based tablet which was released on January 2014.

21回答 すべてを表示
締切られた回答

How to replace ONLY the front glass?

I have a Galaxy Tab Pro 8.4 SM-TM320. the device i'm trying to do is a tab pro 8.4 inch the model is sm t320. I've done tab 2 and 3 but not this one, is the glass only repair pretty simple? or is it easy to break the lcd or anything else? i watched a video it looks easy but i just want a 2nd opinion.

この質問に回答する 同じ問題があります

この質問は役に立ちましたか?

スコア 0

1件のコメント:

the model is sm t320

さんによる

コメントを追加

4件の回答

I tried using loca to fuse a tab 3 8.0 from separating the glass. But, the loca got in the back light and ruined it!!!

If I was to do it again, I would seal up the edges of the lcd, so no glue can seep down the sides and into the back light.

このアンサーは役に立ちましたか?

スコア 0
コメントを追加

Check this video

https://www.youtube.com/watch?v=uvAActsN...

このアンサーは役に立ちましたか?

スコア 0

1件のコメント:

Did you not see the state of the lcd after?

Also, he didn't even use loca to bond the screen.

I would follow the guide up until he re assembled it. And figure a way of the glue not leaking into the sides, else just get a whole new lcd.

The scratches you'll get on there, will not look good.

さんによる

コメントを追加

Here is the translation from German to English using Google Translate starting at 2:41/5:09.

and glass and pull the wire from top to bottom. Here you have the wire

Moving from left to right, so when you were to tell her something. Caution should this Process

carry her to either second or so you should install your hair one

constant temperature of 80 degrees on the crystal arises

Then, when we have arrived at the bottom we removed the glass and put the home button

Next, we need to free the display from the adhesive. We use either

when the glue can easily remove our fingers and Rubein on the

Glue, but this should not be possible - as in this case - you harder

Guns ascend. I like to use isopropanol, a toothbrush and a Razor blade.

First of isopropanol on the display rub and let soak. Then with the

Razor blade the adhesive gradually dislodge. Warning, this process can be quite long

thumbs - works very slowly and carefully, so you do not zekratz the display or

even destroyed. If you are patient, it will pay off in the end.

After this, with a microfiber cloth for display glass degrease. Should you small scratches

have made pure, it is because we in the ON state, the scratches

Now we take the new glass, removing any protective film and stick the digitizer

on the tablet it again. I have used in the video the old glue, because it does not destroy

has been. You can of course also be a replacement part with new adhesive use

So now we constructed the tablet in the reverse order of removal.
このアンサーは役に立ちましたか?

スコア 0

1件のコメント:

I tried to repair the screen as in the German video (which I translated on Google Translate) and the repair failed miserably. The digitizer is attached to a very delicate LCD screen and it will fragment before your eyes if you try to remove the glass digitizer from the LCD screen. If you value your time and pocketbook, send it to a professional for repair.

さんによる

コメントを追加

It's not fused to the LCD so you should be okay with it, follow a tutorial to make sure you know the sensitive areas and get the adhesive for around the edges. I think you will be fine if you have done a Tab before, good luck!

このアンサーは役に立ちましたか?

スコア -1

1件のコメント:

thanks for your answer! well the lcd was glued to the digitizer an i damaged it while trying to get the glass off and im nt sure how to apply the glue on my new lcd to bond it an the digitizer together, an i cant find any videos on this device either, does anyone know of a video that shows how to bond them together or a video of it just on a different device similar to the galaxy tab pro?

さんによる

コメントを追加
統計データ:

過去 24時間: 0

過去 7 日: 0

過去 30 日: 0

今までの合計 14,030