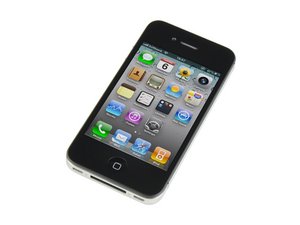
iPhone won't detect charge
Ok so I had a problem with my audio IC, apparently a common problem with the iPhone 4. I obviously dropped it too many times and one day it decided that it was too much. I could hear people perfectly clearly while speaking on the phone, but they couldn't.
A repair shop I went to told me it would need soldering and was too risky, but on the internet I found an interesting video from The Computer Room Nottingham that explained how to simply put a piece of plastic card the same size of the audio IC on top of the chip before closing back the logic board to force the contact between the chip with the motherboard. I then found your website and found your tutorial about logic board replacement, very well done thank you, and did the whole procedure.
Took me a good 3 hours but afterwards everything was working just perfect... until I tried charging it. It just didn't detect the cable when I put it in the dock. My computer doesn't detect my phone when I connect it anymore either. So I opened it again just to try and clean the dock cable connector with a microfiber cloth and isopropyl alcohol, to no avail. The screen did fire up when I plugged back the connector, don't know what that means, and just now when I connected the 21-pin cable into the dock my phone lit up a little just to ask me to connect it to a power source. So it does detect when I plug something in it, but just won't relay power...?
I know I'm supposed to make it short, but I guessed the context would help people understand exactly what it's about. I have some pictures that may be relevant but have no idea how to upload them. Also, some terms might not be correct, I hope everything makes sense, but english is my second language so you might have to read between the lines.
Thank you so much !
[EDIT]
Here are a few images that I hope will help.

1- Here you can see a few tears in the fabric that sticks the ribbon

2- The connector on the motherboard

3- I chose my girlfriend's eye on one of her old ID cards. Looks a bit like art from a Tool album to me.
I just hope that you can see what you need, otherwise I'll just open it again. Thanks for all the help so far.
Update
Sorry for late answer but here we go. I just tried a continuity test on the charging filter, but then I wasn't 100% sure I was doing it correctly. I know how to set the multimeter etc. but I just didn't know where to put the test probes. I added some images (not my phone) here so you can point me where to test. I did notice that the soldering seemed to be damaged, as it didn't go onto the top of the piece as it does on any picture I found on the internet. On the first picture I added nothing, but on the second I numbered the solderings (might not be the appropriate word) because I'm not sure if I'm supposed to test between these. If that's the case, current flows perfectly with whichever two solderings I try.
My girlfriend suggested I would try the treads going from numbers 3 & 4 and the connecting pins. That would probably make more sense, but I guess I'll wait for another opinion before opening my phone again.
By the way, every time I try to connect the dock connector to the logic board, I'm having a hard time because I can't find a reliable way to align the two and I have to try a few times before it clicks correctly... Makes me cringe everytime. I just hope this isn't the reason why I could have damaged the charging filter in the first place.
Thank you again.


 1
1 
 71
71  41
41 
2 件のコメント
Your points are correct. You should get continuity if you measure across those points
oldturkey03 さんによる
Good. So I have a dock connector normally coming in the next few days. I'll keep you informed!
Yann BB さんによる