メインコンテンツにスキップ

Amazon Fire 5th Generation Motherboard Replacement

必要な工具と部品

  1. Amazon Fire 5th Generation Motherboard Replacement, Speaker: 手順 1、 2の画像 1 Amazon Fire 5th Generation Motherboard Replacement, Speaker: 手順 1、 2の画像 2
    • Ensure that your device is turned off.

    • Remove any micro-SD card that may be installed in the Fire. Failure to do so could damage the micro-SD card itself or the micro-SD card reader on the Fire.

    • While holding the device firmly, wedge the iFixit Opening Tool into the crease along the outer edge of the device (as shown in the image).

    • Slowly, grind the iFixit Opening Tool into the crease along the outer edges of the device until the entire back cover loosens.

    • Then, remove the back cover from the device.

  2. Amazon Fire 5th Generation Motherboard Replacement: 手順 2、 2の画像 1 Amazon Fire 5th Generation Motherboard Replacement: 手順 2、 2の画像 2
    • Pry the speaker from the case using the iFixit Opening Tool.

    • Lift the speaker up from the device to remove the speaker wires from their groove in the case.

    • Be careful not to pull the speaker wires from the motherboard.

  3. Amazon Fire 5th Generation Motherboard Replacement: 手順 3、 3の画像 1 Amazon Fire 5th Generation Motherboard Replacement: 手順 3、 3の画像 2 Amazon Fire 5th Generation Motherboard Replacement: 手順 3、 3の画像 3
  4. Amazon Fire 5th Generation Motherboard Replacement, Motherboard: 手順 4、 3の画像 1 Amazon Fire 5th Generation Motherboard Replacement, Motherboard: 手順 4、 3の画像 2 Amazon Fire 5th Generation Motherboard Replacement, Motherboard: 手順 4、 3の画像 3
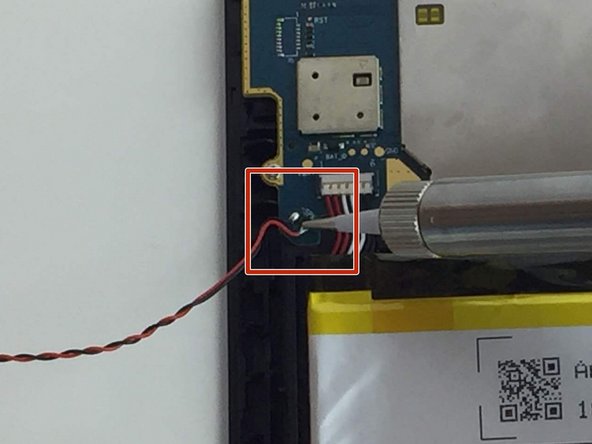
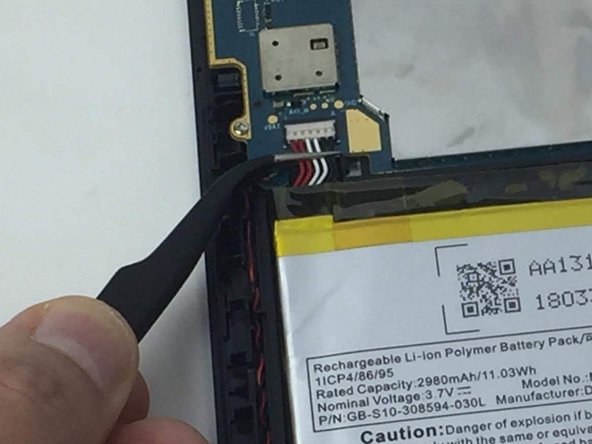
    • The battery connector is located in the upper left corner of the Amazon Fire battery pack.

    • To disconnect the battery connector, use angled ESD precision tweezers to lift the cables up and out of their socket.

    • Make sure you pull the battery connector cables themselves out and not the actual socket. Doing this step incorrectly could result in breaking the connector entirely.

  5. Amazon Fire 5th Generation Motherboard Replacement: 手順 5、 2の画像 1 Amazon Fire 5th Generation Motherboard Replacement: 手順 5、 2の画像 2
    • Use a PH0 size Phillips screwdriver head to unscrew the five 2 mm screws on the motherboard. These screws are circled with red in the given image.

    • Ensure that you keep track of these screws once removed.

  6. Amazon Fire 5th Generation Motherboard Replacement: 手順 6、 3の画像 1 Amazon Fire 5th Generation Motherboard Replacement: 手順 6、 3の画像 2 Amazon Fire 5th Generation Motherboard Replacement: 手順 6、 3の画像 3
    • The LCD- Motherboard connector cable has a protective overlay that you must peel back with precision tweezers in order to expose the actual connector.

    • Gently pull down on the connector cable using precision tweezers in order to disconnect the cable.

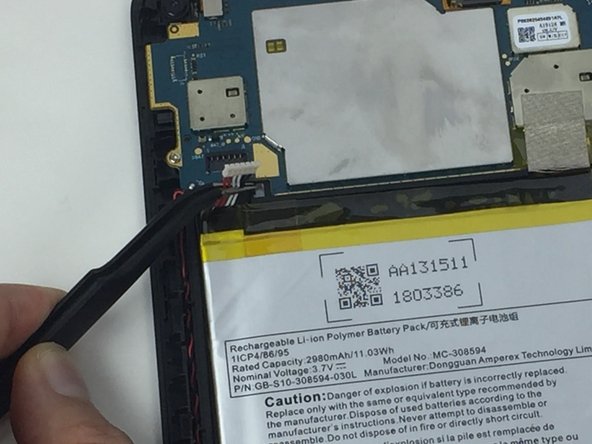
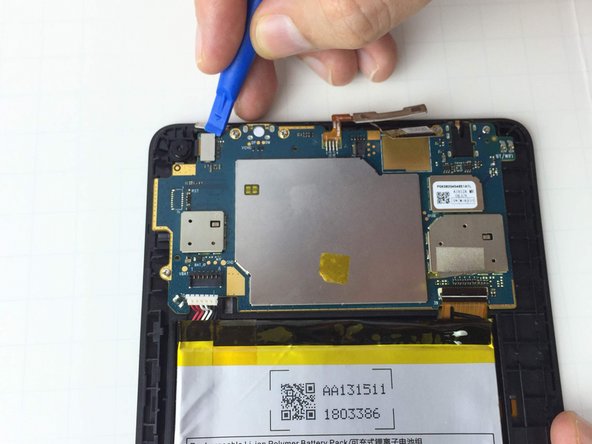
    • The LCD Digitizer on the Amazon Fire tablet has a locking cable connector that holds it in place on the motherboard.

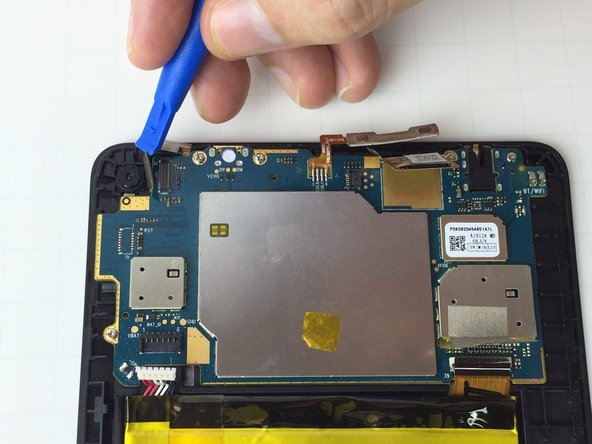
    • To remove the cable, use the iFixit Opening Tool to unlock the LCD Digitizer cable connector.

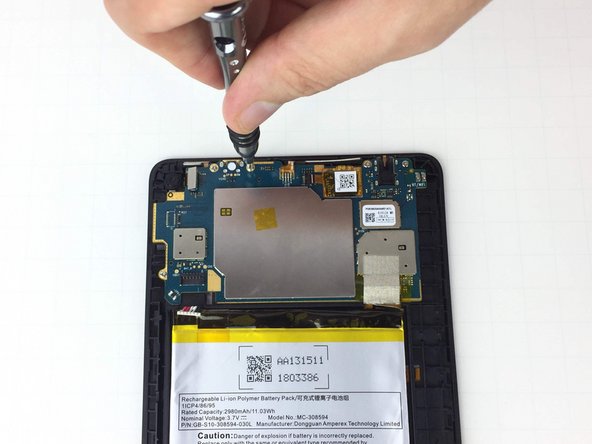
    • Once the wire connector is removed, use the iFixit Opening Tool to pry the entire LCD Digitizer away from the motherboard.

    • Remove any tape that may be covering the connector.

    • The volume and power buttons must both be repositioned in order to remove the motherboard.

    • To reposition the power and volume buttons, use the iFixit Opening Tool to pull the plastic casing upwards. Then, remove the casing completely.

    • Make sure that both the volume and the power buttons are free from the plastic casing before separating the motherboard from its case.

    • Be very careful when repositioning the volume buttons, since the fragile digitizer ribbon cable runs from the motherboard to the digitizer right next to the volume buttons. It is very easy to damage the ribbon cable while working in this area.

  7. Amazon Fire 5th Generation Motherboard Replacement: 手順 9、 3の画像 1 Amazon Fire 5th Generation Motherboard Replacement: 手順 9、 3の画像 2 Amazon Fire 5th Generation Motherboard Replacement: 手順 9、 3の画像 3
    • The rear facing camera wire connector must be disconnected in order to remove the motherboard.

    • To remove the rear facing wire connector, insert the iFixit Opening Tool beneath the connector and wedge it upwards.

  8. Amazon Fire 5th Generation Motherboard Replacement: 手順 10、 2の画像 1 Amazon Fire 5th Generation Motherboard Replacement: 手順 10、 2の画像 2
    • Position the iFixit Opening Tool beneath the motherboard and pull upwards to remove the motherboard from its case.

    • Please handle the motherboard with gloves because skin oils can damage the connections on the board.

終わりに

To reassemble your device, follow these instructions in reverse order.

22 の人々がこのガイドを完成させました。

作成者

6人の作成者と共同で作成されました。

Amber Bunch

メンバー登録日: 02/10/16

1,381 ポイント

3のガイドは作成済み

チーム

USF Tampa, Team 1-2, Nance Spring 2016 USF Tampa, Team 1-2, Nance Spring 2016人のメンバー

USFT-NANCE-S16S1G2

3 メンバー

13のガイドは作成済み

5 件のコメント

where can i get a motherboard from for a 5th gen 2015 ??

Dave Turnbull - 返信

Great manual!!!!!!!

Roger Nelson - 返信

Where is the hard drive? I need to replace that

Dylan Mitchell - 返信

It doesn't use a hard drive, it has a flash chip underneath the big shield on the board which can be pried off with a screwdriver but to remove the chip you will need a heat gun.

Ellis Bowser -

Donde puedo conseguir ese touch de esa table

Yansel Tapia - 返信

コメントを追加

統計データ:

過去 24時間: 3

過去 7 日: 8

過去 30 日: 66

今までの合計 11,243